Jupyter and the Jupyter Lab notebook interface are a widely-used open-source project for interactive, reproducible computing. They are widely used by data scientists. For example, Jupyter powers Google Colab and the automatic manuscript figure rendering in Quarto. Jupyter is written in Python but supports many data science languages including R, Julia, and Matlab.
You can run a Jupyter Lab server as a cluster job and connect to it using a web browser on your local computer. This setup is very convenient for interacting with large data sets and computational expensive operations that would grind your laptop to a halt. It's also a great way to incrementally develop batch jobs to run on the cluster.
Quick Start
Read below for other ways, but here we go over the method in our YouTube video for how to access Jupyter Notebooks in your local web browser using storage and GPUs on the CHPC! The text instructions follow (if you are already a user you can probably skip to 3 or 4):
Prereqs:
Create and activate a new conda environment with the packages you need for your research (at a minimum it will need
jupyterlab). For instance:
[clusteruser@login01 ~]$ . ~/miniconda3/bin/activate
[clusteruser@login01 ~]$ conda create --name jlab --channel=conda-forge jupyterlab
- Get a Slurm allocation to give you resources to run your Jupyter Lab notebooks:
[clusteruser@login01 ~]$ salloc -N1 -n1 --gpus=1 --partition=tier1_gpu --account=pi_name --time=40:00
salloc: Pending job allocation XXXXX
salloc: job XXXXX queued and waiting for resources
- Once you have resources allocated you can run Jupyter Lab:
[clusteruser@gpu01 ~]$ . ~/miniconda3/bin/activate
[clusteruser@gpu01 ~]$ conda activate jlab
(jlab)[clusteruser@gpu01 ~]$ jupyter lab --ServerApp.allow_remote_access=True --ServerApp.ip=* --ServerApp.open_browser=False
- Once the server is running, open a new terminal from your local machine and open an SSH tunnel through the CHPC login node to the GPU node you were allocated:
[localuser@localmachine ~]$ ssh -L 8888:gpu01:8888 [email protected]
Note: If 8888 is being used on your local machine, just replace the first "8888" with another open port like "9876" (e.g.,
ssh -L 9876:gpu01:8888 [email protected]) and then also use that new port after the ":" in the next step, too.
- You can now open your browser on your local machine and navigate to
http://127.0.0.1:8888(or look at the output from 6. to get the URL with the token and skip 9.) - In the text box prompt, just enter the token given as part of the URL displayed when you ran Jupyter Lab in 6.
Done! You can now create Jupyter Notebooks and save them in your CHPC home directory. You can also use the GPUs and CPUs on the CHPC to run your analyses.
Setting Up a Compute Node
Log into the cluster and use srun to request an interactive job with reasonable resources. Here we ask for 4 GB of memory, which should be enough for basic Python work, and 3 hours of runtime, which is the maximum allowed under the free tier. We ask for an interactive bash terminal with --pty bash. Take note of which node the job runs on.
[localuser@localmachine ~]$ ssh login3.chpc.wustl.edu
Last login: Tue Sep 19 14:15:38 2023 from 10.20.145.192
[clusteruser@login02 ~]$ srun --partition=free --nodes=1 --time=3:00:00 --mem=4GB --pty bash
[clusteruser@node31 ~]$
You can also figure out which compute node your job is running on with squeue.
[clusteruser@login02 ~] squeue -u clusteruser -t running
JOBID      PARTITION    NAME        USER           ST    TIME    NODES    NODELIST(REASON)
4074089    free        interact    clusteruser    R     7:58    1        node31
And when you are finished working, you can cancel the job.
[clusteruser@login02 ~] scancel 4074089 # use job id from squeue
Starting a Server
Start a Jupyter Lab server from your interactive job on the compute node. First you will need to load the python Slurm module. Append this line to your ~/.bashrc to avoid having to run it each time you log in.
[clusteruser@node31] module load python
Then you can start a Jupyter Lab server using the system-wide Python environment. For a full list of options see jupyter lab --help-all.
allow_remote_access=Trueallows you to connect from your local machine. Otherwise you would need to run a web browser from an interactive Desktop session on the compute node.ip=*causes the Jupyter Lab server to listen on all IP addresses instead of just 127.0.0.1, another prerequisite for you to connect from your local machine.open_browser=Falsetells jupyter not to try to open a web browser on the compute node. You will open a web browser on your local machine instead.
[clusteruser@node31 ~]$ jupyter lab \
--ServerApp.allow_remote_access=True \
--ServerApp.ip=* \
--ServerApp.open_browser=False
You will see a lot of output ending in something like this:
To access the server, open this file in a browser:
    file:///ceph/chpc/home/clusteruser/.local/share/jupyter/runtime/jpserver-3437668-open.html
Or copy and paste one of these URLs:
    http://node31:8888/lab?token=f43fc437c5bc23e4b1606808651a09895737ef3b11ab56d4
  or http://127.0.0.1:8888/lab?token=f43fc437c5bc23e4b1606808651a09895737ef3b11ab56d4
Copy the entire URL starting with http://127.0.0.1:8888/ to your clipboard and note the port number, here 8888. Jupyter will try to bind to port 8888 and keep incrementing the number until it finds an open port.
Note: You can request a fixed port number with:
--ServerApp.port=8888
Open an ssh tunnel from some port (the first 8888) on your local machine to whichever port jupyter is listening on (the second 8888) on the compute node (e.g. node31).
[localuser@localmachine ~]$ ssh -L 8888:node31:8888 login3.chpc.wustl.edu
Then paste the URL into your local computer's web browser. You should see something like this. Congratulations, you are running Jupyter Lab on the cluster!
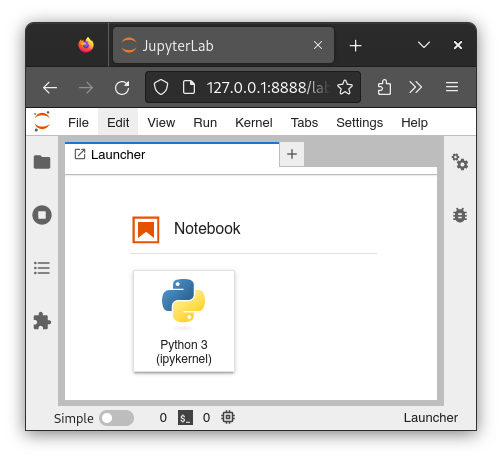
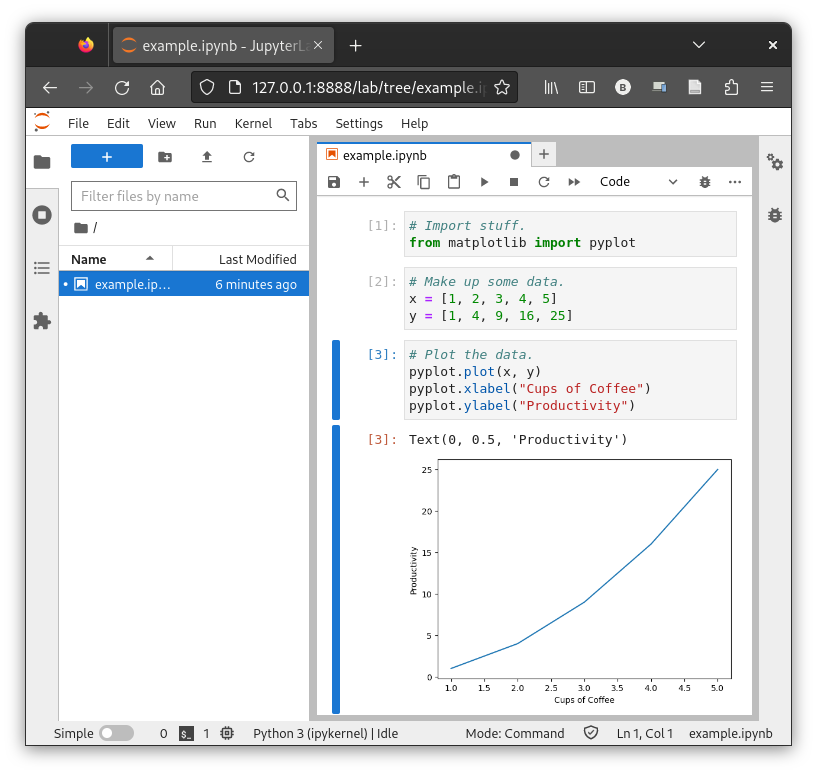
Python code in the Jupyter notebook will run on the compute node, and results will be rendered in your local machine's web browser. For example:
When you are finished, close your web browser and, on the compute node, press Ctrl + C. You will be promped with:
Shutdown this Jupyter server (y/[n])?
Enter y and you should see the server shut down.
Shutdown this Jupyter server (y/[n])? y
[C 2023-09-25 13:57:57.387 ServerApp] Shutdown confirmed
[I 2023-09-25 13:57:57.425 ServerApp] Shutting down 4 extensions
[I 2023-09-25 13:57:57.426 ServerApp] Shutting down 1 kernel
[I 2023-09-25 13:57:57.426 ServerApp] Kernel shutdown: 9c05c4d2-c5b7-4e0b-819b-d2b2cd984d83
[I 2023-09-25 13:57:58.163 ServerApp] Shutting down 0 terminals
[clusteruser@node31 ~]$
Keeping an Interactive Job Alive With Screen
Should you accidentally lose the interactive ssh connection to the compute node your Jupyter Lab server may shut down. To keep it open, use a terminal multiplexer like screen or tmux to keep the terminal connection going in the background. For example:
[clusteruser@node31 ~]$ screen -S jupyter # can use any name
[clusteruser@node31 ~]$ jupyter lab
# output from jupyter server...
Then press Ctrl + A followed by d to "detach" from the terminal. You can use screen to "reattach" to the named terminal.
[clusteruser@node31 ~]$ # detached from terminal
[clusteruser@node31 ~]$ # jupyter is running in the background
[clusteruser@node31 ~]$ screen -r jupyter
# reattached to terminal
# press Ctrl + C to kill the server
# press Ctrl + A, then d to detach again
Running Jupyter as a Batch Job
Instead of starting an interactive job with srun --pty bash you may submit a batch job that automatically starts Jupyter. Create a slurm script like this one and give it a name like jupyter.sh. Make the script executable with chmod u+x jupyter.sh.
#!/bin/bash
#SBATCH --job-name=jupyter
#SBATCH --partition=free
#SBATCH --nodes=1
#SBATCH --time=3:00:00
#SBATCH --mem=4GB
pwd; hostname; date # for logging purposes
module load python

jupyter lab \
--ServerApp.allow_remote_access=True \
--ServerApp.ip=* \
--ServerApp.open_browser=False
Submit your job with sbatch and then check to see if it is running with squeue.
[clusteruser@login01 ~]$ sbatch jupyter.sh
Submitted batch job 4089300
[clusteruser@login02 ~] squeue -u clusteruser -t running
JOBID      PARTITION    NAME        USER           ST    TIME    NODES    NODELIST(REASON)
4089300    free        interact    clusteruser    R     0:10    1        node15
Inspect the job's slurm output to get the URL to connect to the Jupyter Lab server. Note the port number in the URL.
[clusteruser@login01 ~]$ egrep -o 'http(s)?://127.0.0.1:[0-9]+/lab\?token=.+$' slurm-4089300.out
http://127.0.0.1:8888/lab?token=a0237c01c8c25c3e443e6060f088013935b72955056ce6be
Open an ssh tunnel to the appropriate compute node and port.
[localuser@localmachine ~]$ ssh -L 8888:node15:8888 login3.chpc.wustl.edu
Now you can copy and paste the Jupyter URL into your web browser and use your notebook. When you are done, close your web browser, exit the ssh tunnel, and cancel the job, which will shut down the Jupyter Lab server.
[clusteruser@login01 ~]$ scancel 4089300
Jupyter from a Virtual Environment
Python developers frequently need to install specific versions of packages not available in the system-wide Python environment. You have free reign to install just the right packages inside a Python virtual environment. Follow our documentation to set up a miniconda environment, or you can use pip to create a simple virtual environment in the folder .venv and install jupyter like this. We recommend you also install the lsp language server packages to get syntax highlighting and coding hints.
Note: Folders starting with a
.are hidden. You can list them usingls -a. You don't have to put your virtual environment in a hidden folder -- you can call the folder whatever you want.
[clusteruser@node31 ~]$ python -m venv .venv
[clusteruser@node31 ~]$ source .venv/bin/activate
(.venv) [clusteruser@node31 ~]$ pip install --upgrade pip
(.venv) [clusteruser@node31 ~]$ pip install jupyter jupyterlab-lsp python-lsp-server
And to re-enter the virtual environment later, just run:
[clusteruser@node31 ~]$ source .venv/bin/activate
(.venv) [clusteruser@node31 ~]$ # now you are in the virtual environment
Note: Some developers prefer to manage packages and virtual environments using conda instead.
Once you have everything set up you can run your Jupyter Lab server from the virtual environment as usual; see above for all of the command line options.
(.venv) [clusteruser@node31 ~]$ jupyter lab
Using the "Classic Notebook" Interface
The preceding examples use the latest and greatest Jupyter Lab interface. If you prefer the older but "classic" Jupyter Notebook interface, follow all the steps above, but instead of launching jupyter lab use jupyter notebook. For example:
[clusteruser@node31 ~]$ jupyter notebook --ip=* --no-browser
To access the notebook, open this file in a browser:
    file:///ceph/chpc/home/clusteruser/.local/share/jupyter/runtime/nbserver-983560-open.html
Or copy and paste one of these URLs:
    http://localhost:8888/?token=26236aedf5fb4c3305361c01ddca271efb7fe93f4601f6db
    or http://127.0.0.1:8888/?token=26236aedf5fb4c3305361c01ddca271efb7fe93f4601f6db
Use the provided link and port number to set up an SSH tunnel and connect as above.
See Also
- Importing and Exporting Data from outside the cluster. In particular, see the section on using sftp from a Python script. You can easily adapt the example to import and export data from inside your Jupyter notebook.
- Visual Studio Code is a popular IDE with support for Jupyter notebooks. You can write your code in the familiar VS Code IDE and run the code interactively on jupyter from within the IDE, without the need to manually configure jupyter and start a web browser. VS Code also has lightweight code cells if you don't want to store a big
*.ipynbfile. - Matlab Jupyter Kernel to run Matlab code in your Jupyter notebook.
- R Jupyter Kernel to run R code in your Jupyter notebook.